how to fix concrete steps

A step-by-step tutorial on how to fix chipped concrete steps at your home.
When you have a home, it's inevitable that over time, things will break or crumble right below your feet. And some deterioration can cause nightmarish results if you don't catch them in time (like our old pipes ).
Luckily, others are clearly visible and easy to fix.
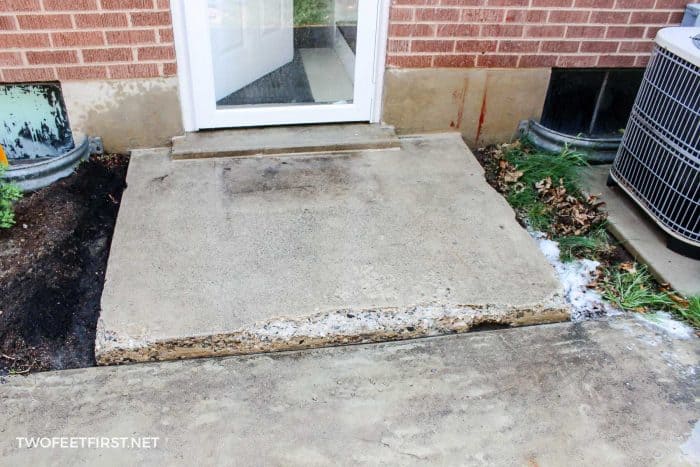
Our back and front porches looked very ragged at the corners and sides, not doing much for our curb appeal.
Here is our front porch:

And here is our back porch – this one is even worse:
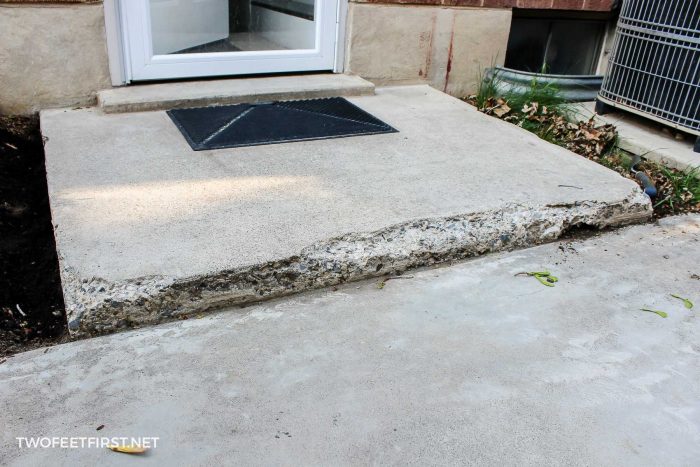
It's tempting to rip all of it out and install new cement but that can be very costly. After doing some research, I decided to patch our steps myself.
Disclosure: This post contains some affiliate links or referral links for your convenience. It is a way for this site to earn advertising commissions by advertising or linking to certain products and/or services, click here to read my full disclosure policy .
FIX CHIPPED CONCRETE STEPS
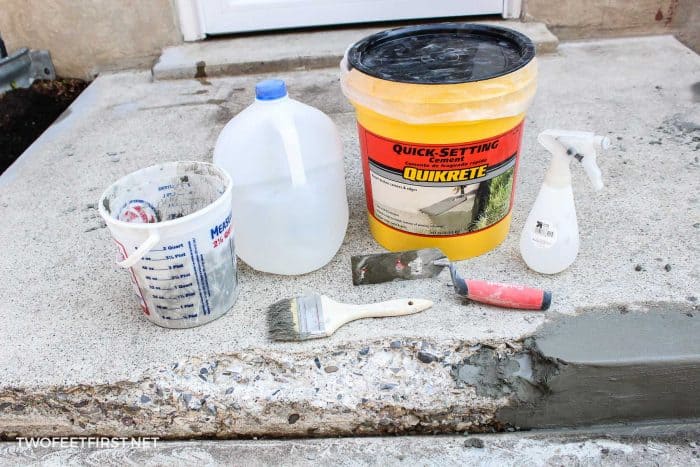
MATERIALS:
- Cement (found mine at Lowe's)
- Water
- Cheap Paint Brush
- Spray bottle w/water inside
TOOLS:
- Margin Trowel
- Wire brush
- Putty knife
- Bucket (to mix cement)
You can print the material list and instructions below.
REMOVE THE CHIPPED CONCRETE
First, you need to clean the area and remove all the chipped concrete. Using a putty knife and wire brush, I vigorously removed all the chipping/flaking concrete.
Then, I used the hand broom to sweep the steps.

CLEAN THE WORK AREA
After all the chipped concrete was removed, I washed the area with dish soap and water.
Next, I used the garden hose with a sprayer attached and washed the area with clean water. Then, I let the area dry completely.
MIX THE CEMENT
Now we are ready to mix the new cement. I used a ratio of about 1 part water to 5 parts dry cement mix. Only prepare a small amount at a time because it has to be applied within 5 minutes.
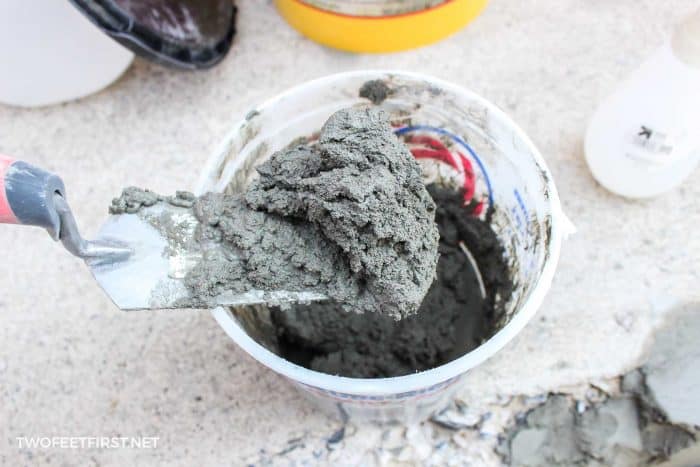
TIP: There is also a bonding agent that you can use instead of water. I probably should have used this because of the large amount of cement I needed but we will see how it holds without it.
UPDATE: You can also apply the bonding agent to the old concrete before applying the new. If you would like to make sure the new concrete will have a better bond, you can drill holes into the old concrete then attach an anchor. I posted about this project on Hometalk and people have commented that you can just drill the holes or you could add rebar to the holes. Hope this helps!
APPLY THE CONCRETE
Once the cement is mixed, take the spray bottle and spray the area lightly with water; you only want it damp (no pools of water).
Then, I took the trowel and applied the concrete, making sure to get it into all the cracks.
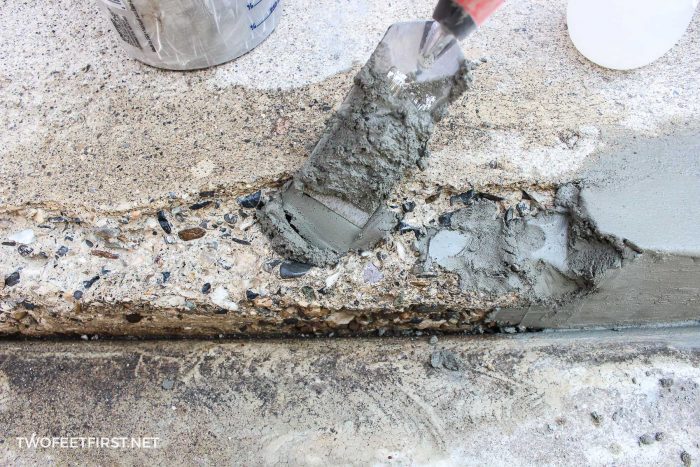
SHAPE THE CONCRETE AREA
I carefully built the area back to the shape it needed to be, sometimes using a board. I then let the area sit for a couple of minutes to harden slightly.
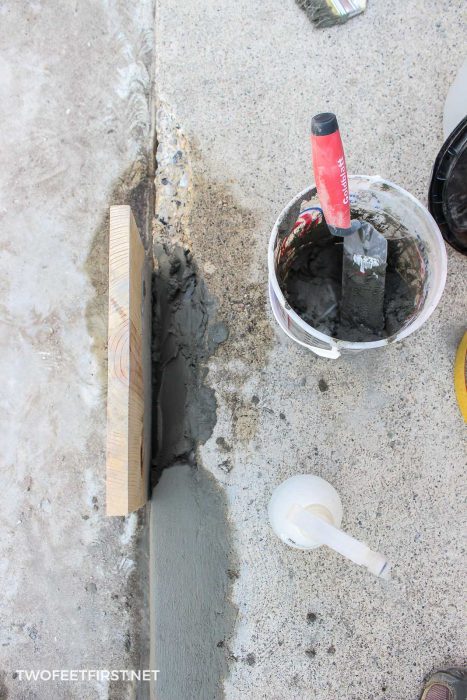
At this point, I finished shaping the area,rounding the corners, and making everything level.
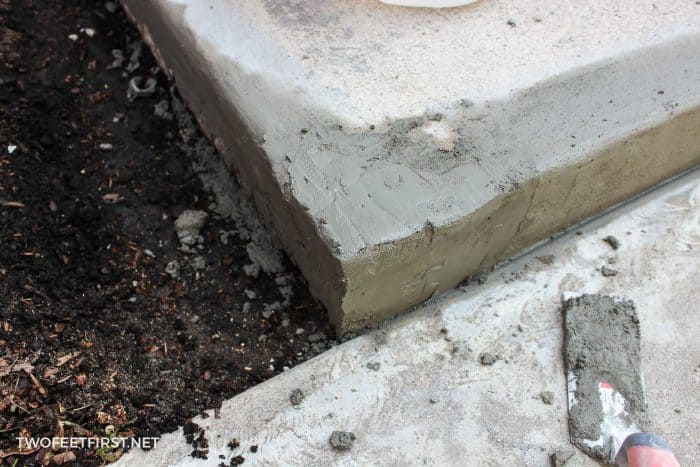
THE FINISHING TOUCHES
Next, I lightly sprayed the area with water then taking the paintbrush, I painted the cement to give it a brushed finish.
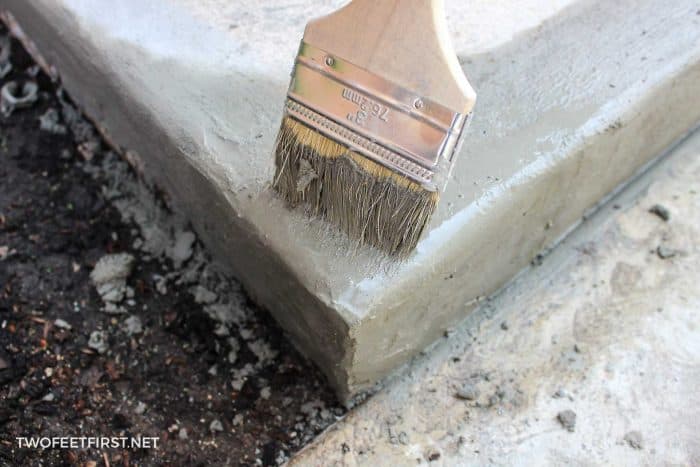
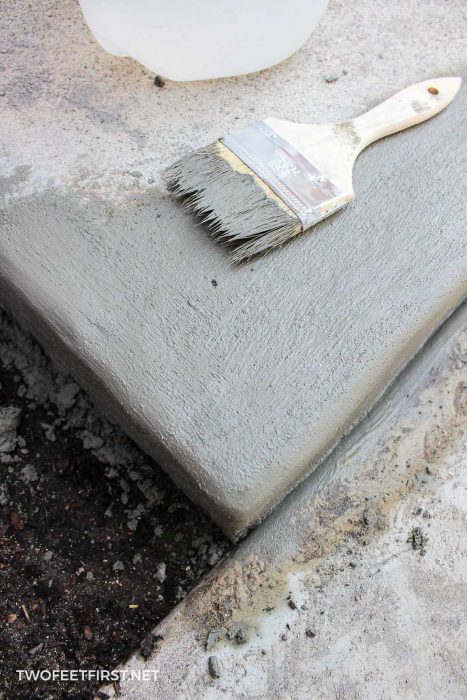
I worked on the next section of the cement, completing all the steps until I was done with the porch. Then, I let the whole area dry. It will fully cure after a couple of weeks but after 24 hours you can walk on it.
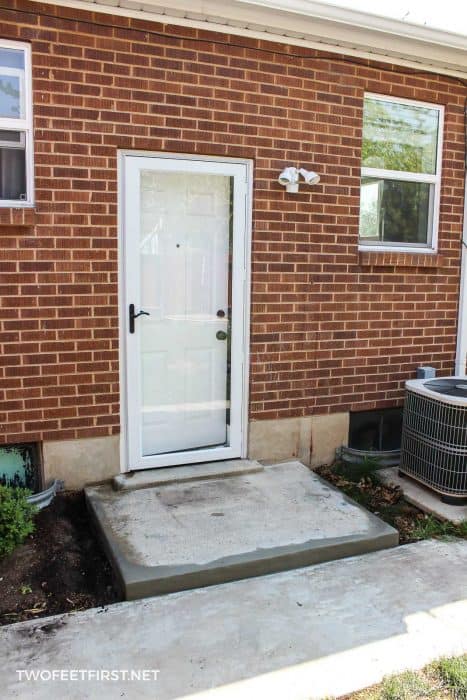
There is a noticeable difference in the color of our old & new concrete, so I could paint or apply a thin coat of concrete over the area to make it look the same. Right now, I'm just happy to see all that chipped concrete gone!
Here is the biggest change: the back porch.

Can't remember the before, here is a side by side of the porch.
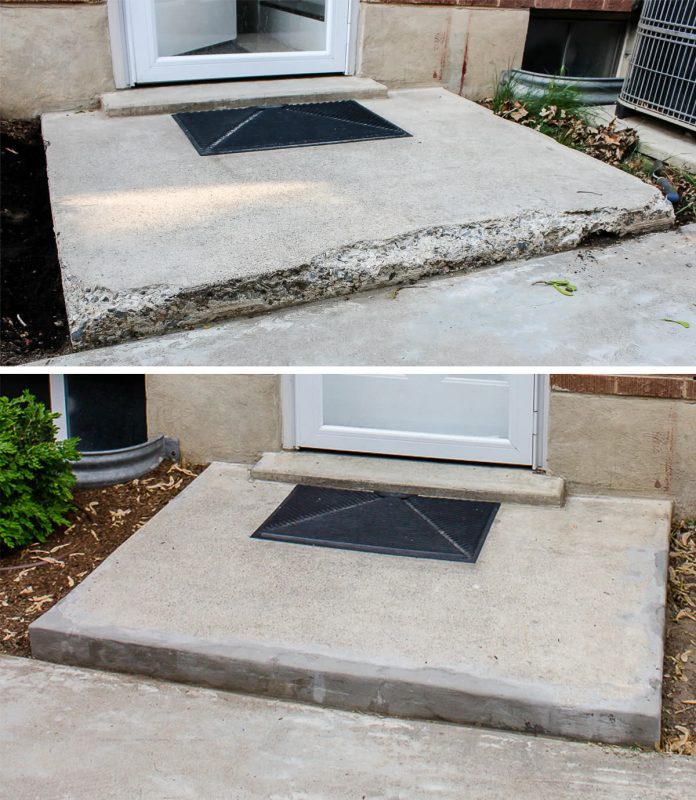
And here is our front porch currently:

SIDE NOTE: We updated our front porch even more by adding a porch to our existing house plus wrapping the columns.
This was a cost-effective way to fix chipped concrete (it was less than $20!) and only took a couple of hours.
UPDATE 6/2016 – See how our steps are holding up one year later and if we would do it again !
Prep Time 20 minutes
Active Time 1 hour
Additional Time 1 day
Total Time 1 day 1 hour 20 minutes
Difficulty Moderate
Estimated Cost $
Materials
- cement (found mine at Lowe's)
- Water
- Cheap Paint Brush
- Spray bottle w/water inside
Tools
- Margin Trowel
- Wire brush
- Putty knife
- Bucket (to mix cement)
Instructions
- Remove the chipped concrete with a wire brush and putty knife.
- Clean the steps.
- Mix the cement.
- Apply the concrete to the areas that need repair.
- Shape the concrete with wood.
- Lightly paintbrush the new concrete to give it a brushed finish.
- Allow the concrete to dry.
how to fix concrete steps
Source: https://www.twofeetfirst.net/fixing-chipped-concrete-steps/
Posted by: jacquesowelp1978.blogspot.com

0 Response to "how to fix concrete steps"
Post a Comment